Colourful

Colourful

Thursday, 14 April 2016

Crochet Hook Case / Roll

Sorry it’s been so long since the last post, I have been a busy bee! So this is going to be a tutorial for a crochet hook case. It links with Granny Square Blanket post. The friend I taught to crochet bought some hooks of her own and I thought it would be a nice idea to make a case for her. I didn’t think to write a tutorial for it so didn’t photograph the original, but after I made it I realised how easy it was to make and made one for myself. It can easily be made with 2 contrasting fat quarters (I also used a lightweight fusible interfacing to add a little bit of rigidity but I don’t think it’s necessary) so here we go:
I started with this beautiful strawberry fabric and a red plain as contrast. The main panel is 22cm by 28cm, cut one main and one plain fabric (and interfacing if you’re going to use it). The crochet pocket is 13cm by 28cm cut the same as the main panel. I also cut a strip of pain fabric 4cm by 56cm to use as the tie but you could use ribbon or elastic if you like. I used a 1cm seam allowance (included in the cut)
I’m going to do this in three steps, I am confident it is that easy and won’t take much time.

Step One – the crochet pocket:
Take the crochet pocket pieces right sides facing and stitch along the top only (make sure if your pattern is directional it’s the right way round, I’ve done this a few times and it’s so frustrating!!!). Turn it the right way round and iron it flat. Take the plain fabric from the main fabric and line up the crochet pocket with the bottom edge, pin in place. You want the right side of the plain fabric and the right side of the crochet hook pocket looking at you. On the bottom mark off your 1cm seam allowance on both sides and from there mark in 2cm intervals. Stitch up to the top of the crochet pocket at each of these marks except for the seam allowance marks (you will see this stitching so you could use a nice contracting colour thread or one that will blend in).
Step Two – Making and placing the tie.
Fold the long strip of fabric in half and stitch the long edge and on short end. Turn the right way round I use a crochet hook to help push it the right way round. Iron flat and ladder stitch the open end. Or just use ribbon or elastic, your choice! Fold it in half and then I tacked my tie just above the crochet hook pocket so it lay flat over the crochet pocket (because you want it on the outside when you’ve stitched it together).

Step Three – Finishing (told you it was quick!)
So the last thing is the patterns main panel fabric piece. Place this, right sides facing, on top of the crochet pocket piece and pin in place. Stitch round the whole piece laving small gap for turning. Turn case the right way round and ladder stitch the gap closed. Iron the case. At this point you can either leave is as is and fold the top over as and when you choose or you can do what I did and fold the top down so it just covers the top of the crochet hooks and top stitch down each side to secure, iron gain  if you do this.
There you have it, one crochet hook case done!!!
 It rolls up so you can pop it in your craft bag and it’s easy to take on the road without taking up much space
Here is the one I made for my friend, she loves owls!

Thursday, 10 March 2016

DIY Bracelets

 I bought some fimo beads a while ago to make a funky bracelet. I finally finished it last night and it come out just how I wanted it to!
This led to me looking into what other jewellery I could make. I haven’t made jewellery myself before but it could be a fun venture and may lead to some nice birthday gifts. I like pearl jewellery, I think it’s pretty, understated and feminine so I bought a small bag of white and a small bag of cream ‘pearl looking’ glass beads and I can’t wait to see what bits and bobs I can make with them!
The project I want to show you is in the background!

On my many hours of Pinterest browsing I come across a Pearl and Ribbon Pin and thought I would give it a go. So off to the market I went and bought some beautiful ribbon (pale blue and white polka dot and navy blue and white striped) along with other crafty stuff and things but that’s a story for another post!
I started with the light blue and white polka dot ribbon and the cream ‘pearls’. When I looked at the spacing for the ruffle and the ‘pearl’ I realised that the polka dots were perfect for making sure each placement would be the same.  I left 10cm at the start of the bracelet and used really strong thread to start fixing the ‘pearls’ to the ribbon (on forget when you finish with the ‘pearls’ to leave another 10cm on that end for the bow!).
The ribbon I bought is a similar width to my beads so when the ribbon ruffles the ‘pearls’ get the credit they deserve!
I didn’t want pearls all the way around so mine sit on top of my wrist with the ribbon fastening underneath. And you end up with a cute delicate bracelet. I am thinking about restringing it with thin elastic which would make it more secure but still keep it delicate.
I think I’m going to try some wirework, maybe a pearl ring or caged pearl necklace but I haven’t decided yet! Anyway, till next time…


Thursday, 3 March 2016

Candles

I love candles! I buy a lot of candles but it’s disappointing when there is left over wax after the candle is no longer usable, so I collect the leftover wax and make more candles!!!
I buy the wicks online, you can either buy them pre-cut with the metal bottoms or I buy a length that can be cut to whatever size I need. I used to collect pretty jars and then I got into teacup candles but you have to be careful to make sure it doesn’t look like you’ve got you dishes scattered about the house! On my travels the other day I come across these lovely diamond cut glasses that I thought would look beautiful with the light inside catching the pattern in the glass so here you go:

I use an empty metal coffee tin with a lid to collect the scrap wax. Heat a pan of water on the hob and put metal tin into the water. The wax will melt inside the tin.
Dip the metal bit on the end of the wick in the wax to centre and secure it in whatever you are using as a candle (just make sure it can stand the heat), I then tie a bit of cotton to the tip of the wick.
Pour the melted wax into your new candle (be careful, the metal tin will be hot) but retain a bit because when the wax has set it will sink so you will need some to level the top. Then wrap the cotton around a skewer (or fork or pen it doesn’t matter) and balance it on top of your candle, this will ensure the wick doesn’t fall into the wax and make it unusable.


Let it set overnight and re-melt the leftover wax the level out the sink hole.
This is the way I do it but you can buy the wax online or from craft supply stores.

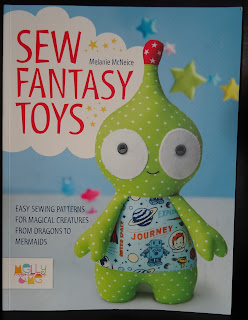
Sew Fantasy Toys

So I bought this book at the end of January and I love it!!!


The patterns are clear and easy to follow and so cute. So I wanted to share with you some of the toys I have made from it so far.


Sew this is the gang! The book is sectioned so you can build your confidence to the more complex patterns which is what I’m doing.


I love these little guys! I haven't finished the dragon yet but I wanted to share this with you. My machine and hand sewing confidence is growing and I am looking forward to my next project.


Today is the last day of the Granny Square Blanket so I now have 40 squares ready to give to my friend. Unfortunately, I don’t think my friends have managed to keep up with my pace. Hopefully I’ll have pictures next week!

Wednesday, 24 February 2016

Granny Square Blanket


My Finished blanket.
Granny squares. I love granny squares, basic ones are repetitive and easy to learn and there are so many variations ranging into the very complex! I tried to learn to crochet from books but this did not go very well and the most I achieved was a well-constructed knot of wool! But a couple of years ago a lovely lady at a craft group spent some time teaching me and it just clicked! Having her watching what I was doing and pointing out where I was going wrong and helping correct me was the key to teaching me. After that I crocheted more than knitted.

I did attempt a crochet-along but found the complex patterns too much for a beginner, although it did help me create my first (small) blanket and some of the more complex patterns are beautiful and I will revisit them at some point. I have a pattern that looked like a sweet which is awesome! Anyway this led to my love of the simple granny square blanket so I did the math and figured I needed 120 squares to make a double bed sized blanket and I got down to it. My squares were as basic as they come, one colour 6 rounds. It took AGES. 120 squares is no small feat for one lady! It is well worth it and I can now do a basic granny square in my sleep. However while making my blanket I did make a few mistakes and I feel if I tell you them here maybe you can avoid making the same ones:

Not tying in the ends as I did the squares – I got to about 90 squares and realised that I was going to have to go back over all 90 squares and tie in all the ends. This was very disheartening and set me back about a week. Lesson learned!

Thinking about the finish line – At about 100 squares I was so happy because I was thinking ‘I only have 20 squares left to go’. Getting the squares is only the beginning.

Not thinking about how I was going to put it all together at the end – So going back to the last mistake, I started to think if I’m so close to the end I need to think about how it’s all going to come together. My smaller blanket has the traditional connection but this leaves a bit of a ridge and I didn’t want that so I searched the internet for a flat binding method. I found the perfect method but I needed to edge all my squares in my binding colour so I had to go back and edge all 100 squares in one round of black. This again set me back and disheartened me further.

Making the squares the same size rather than the same amount of rounds – This was stupid and I don’t think anyone else would make this mistake but I had a slightly finer wool for about 10 of my squares and when making them I laid them on top of the other squares and decided they could do with another round. This wasn’t going to work with my joining method so I had to unpick around the edge it in black again. I will not do that again!
So there you go, just a couple of things to keep in mind when creating your granny square blanket. It sounds a bit negative but I love the results of my blanket and I am very glad I made it and all the bumps along the way are learning curves that I am grateful for! Maybe I’m just impatient!

My friends and family love this blanket. It is massive and warm and my favourite thing is to cuddle up under it and watch TV.

So what has prompted me to write this post is another friend of mine is moving into her own place and wants one of these blankets for her settee. I wouldn’t have been able to make the blanket myself in time for her move but really wanted to do it so I taught her to crochet and thought we could split the task. She went home and taught her mum to crochet and now there are 3 of us working on the blanket. I figured between 3 people we only have to do 40 squares each, that’s only 3 a day for 13 days and one each on the last day (much quicker that when I made mine!). So here is my stash so far:


Crochet is good for the soul and I would encourage everyone to learn, maybe get together as a group and have fun.


I’ll keep you posted on our shared project!

Sunday, 21 February 2016

Baby Sampler.

 My friends baby has entered the world healthy and beautiful! Congratulations to her and her family on such a beautiful little guy! Now as promised here is a picture of the sampler (I have blurred the name).


Now considering I only had 2 months to finish it and I didn’t have a cross stitch chart I think I did well! The hardest part was getting the lettering right so let me talk you through it. It may take a little time but it isn’t too difficult and it’s worth it!

You will need some graph paper or make a graph of your own. I used graph paper. I counted how many cross stitch squares across and down I had to play with for the name and drew this onto my graph paper. I then figured out what font I was going to use and practiced underneath the box I’d drawn, like so:


Then I transferred the text into the box I’d drawn, finding the middle of the space and the middle of the text to centralise it. Nice and easy. Obviously the more text the more difficult and as you can see from the blur the name was quite long!

You could also use this technique for pictures by transferring the picture onto a grid, which means you can make your own custom cross stitches!


Anyway I am very happy for my friend and her family.

Friday, 12 February 2016

Sewing Machine Bag

I didn’t realise how many nice bits of fabric I had accumulated over time! You know, when you see a really nice print or just like the feel of the fabric and it would be rude not to buy it! So, yeah, I have lots of fat quarts and no idea what to do with them. Then I looked at my sewing machine, sat sad and covered in the horrible off-white plastic dust cover it came with when I bought it and it occurred to me that it’s the old two birds one stone situation. I really wanted to try patchwork and making a cover for the machine as a means of showing off some of the selection I have built up.

I measured the machine to figure out what I’d need and 5cm squares would mean I needed 180 squares. Seen as this is my first patchwork project the thought of having to get 180 squares exact was a lot of pressure! So I changed from squares to strips. I needed 8 long strips for the wide sides and bottom of the machine and 3 strips for the shorter sides of the machine. So I measured it all up, cut out my strips and sewed them together. Then ironed all the seams flat.


From here all I was going to do was add side panels and lining and open part of the seam on the top for the sewing machine handle to pop through, maybe add some piping et voila. One dust cover for the sewing machine. But wait what if I made a bag? Having a padded bag would be good and if\when I move it will protect it. Decision made.
I already had the body and side panels plus the lining but I wanted it padded so I bought some wadding and cut out 2 short side panels, 2 big side panels and a base.


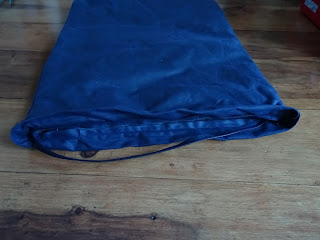
I stitched the padding together with the lining but left one of the corners open to turn everything though at the end (like the drawstring bag and protective case posts). I was hoping the wadding would add structure but also help take the weight of the sewing machine. There would be no point in a bag if when lifted, it bottomed out and my sewing machine lay in bits on the floor! So in a panic I asked Mr TimeForCrafts to buy some bag handle cord stuff, heavy duty and either black or white! He made the best choice, it was the strongest stuff I’ve ever seen and the colour choice was perfect he found some that was grey with a cream trim that really suited the patchwork! I had 3 metres which I stitched together to make a loop and stitched it under the bag and up the sides, this way the bag strap also holds a lot of the weight of the sewing machine.


I would have liked to add a zip to the top but at this point I had struggled with the wadding, confused myself on how it would be put together, snapped a needle on the hard core handle and spent over a week on the project that should have only taken a couple of days! So next time I make a bag I’ll add a zip!
At this point it’s pretty simple. Stitch the patchwork layer together, place it inside the padded layer (right sides facing) stitch round the top and pull through the bottom. Ladder stitch the hole and push the inner layer inside the patchwork layer.
I ironed everything to make it all nice, the only thing I found was where I turned the bag right side round there was a little lip on the bag handles but I ironed them down and it’s not a problem.


So I have made a bag! It is padded and reinforced to withstand the weight of a sewing machine. I will add a patchwork panel and zip on the inside to act as a dust cover soon but for now I think I am happy!

Wednesday, 27 January 2016

Protective Case Post

 It’s been a while, but on the plus side I have very nearly finished the cross stitch for my friends baby!

I bought Mr TimeForCrafts a lightbox for Christmas so now I’m making a cover for it so it can be stored safely and carried about if and when needed. I have a nice soft but thick fabric for the inside so the lightbox doesn’t get scratched, a fabric chosen by Mr TimeForCrafts and a zip that fits across the top of the bag.


I will write this up for the lightbox but you can adapt the method for anything you want to make a protective case for.

First of all I need to measure the lightbox, 48cm by 36cm. I am going to add half a centimetre on because it is thick fabric and don’t forget the seam allowance (this is going to play out very much like the drawstring bag post). I cut out the inner fabric and stitch up 3 sides. With the outer fabric, I made it 5cm longer than the inner and stitched around 3 sides.
Then placed the outer inside the inner, wrong sides facing. I then folded the top of the outer fabric over to the inner fabric and pinned the zip along where the two fabrics meet. Stitch.


I turned the bag the right way round and, with great difficulty, pinned the other side of the zip to the opposite side of the bag and stitched.


This should leave about a 2.5cm lip around the top of the bag, a nice stitched line around the bag that is also hiding the raw edge of the inner fabric and a zip inserted 2.5cm down from the top of the bag.


Don’t forget to iron it so it looks kind of nice!!!


Hope this makes sense, enjoy! 

Friday, 15 January 2016

Drawstring Bag Tutorial

This is going to be my first step by step. I am a little worried because I’ve never made a drawstring bag before but I suppose there’s a first time for everything! I am making this for a game where you draw a name out of a bag and try to describe who they are to your team mates, great game!!! Anyway I’ve gathered some bits and bobs and I’ll write as I go so I don’t miss anything out and let’s see what we get!

I am starting with:
o   Red fabric for the outer and the lining but you could have contrasting fabrics just make sure if you fabric has a directional pattern that you orientate the pattern the right way!
o   Fabric scissors and pinking shears
o   A ruler
o   2 metres of 5mm black cord
o   Sewing machine (you could sew by hand if you wanted)


I need to decide how big the bag. Mine has to be big enough for the name cards to be shaken up and a hand to draw the names out. So I’m going to go with an A4 size bag (nice and easy, everyone knows how big that is!!!) Just remember whatever size you choose to take into account the seam allowance, I am going to use the 10mm mark on my machine.

1.   Cut 2 outer and 2 inner fabric pieces. Pin the 2 outer pieces together, right sides facing, and stitch round three sides. Pin the 2 inners together, right sides facing, and stitch around three sides but leave a gap the bottom edge big enough to turn the fabric through when you stitch the inner to the outer (2-3 inches is a good size).


2.   At this point you could press your seams open and make it easier to thread your cord at the end but I haven’t. I did trim the excess fabric from the seam and the corners so the bag lining sits better. Then turn the outer the right way round (right side out) and put it inside the lining so the right sides are touching (my outer bag and lining are the same colour so I couldn’t photograph this!). Pin around the top then sew round remembering your seam allowance then pull the outer bag through the gap you left at the bottom.


Slip stitch the gap and push the lining into place and iron flat. You should now have a beautiful lined bag!


I need to decide where I want the drawstring bit and I need to be accurate so I am going to measure it!

3.   Measure and inch down from the opening and mark all the way around the bag, then from that mark another inch down all the way around.


Stitch along both marks to create a channel for the cord or ribbon. If the cord or ribbon is thicker you will need to adjust the width of the channel.


Unpick the seam between the channel stitches to create the holes where the cord or ribbon with go through.


4.   You will need two pieces of ribbon or cord. Thread one end through one of the openings, round the whole bag and out through the same opening. Thread the other piece through the other opening and repeat. Tie off however you like.


Well there you go, a drawstring bag from start to finish. Hope it goes well for you and my instructions are clear and easy to follow. Enjoy J


Oh, a little celebration please for this being my 10th post!!!

Thursday, 14 January 2016

Driftwood Crafts

I mentioned before in the razor clam post  that I love beach crafts and the memories I have attached to them. So I wanted to share driftwood crafts today. Driftwood is amazing and it is not surprising that it can be hard to find because lots of people want it!!! The best time I found to collect it is first thing after a storm.

So I collected lots of driftwood and started small by making driftwood boats. I had a long strip as the base and tried to use pieces that were ‘boat shaped’ to screw into the base, I used thinner straight pieces as masts and made some plain fabric sails attached to the boats with twine. The boats are about the width of a standard bookcase (that’s where these boats normal live!)


This piece of driftwood is a candle holder. It is a large piece of wood that I sunk tealight size holes into the top. It has such a unique grain and is just beautiful. This one was a little harder to photograph!


And finally I have this beautiful driftwood heart. I spent a long time planning out what pieces I was going to use and where they were going to be placed and at one point it was a star not a heart but I finally settled on this layout. I had a thin piece of MDF that I used to back the heart and the larger pieces are tacked to it, the rest are held in by a little glue and very careful placement (wedged in!) It is a wall hanging (another reason for the MDF) and hangs in my kitchen.


I also have a little jar of sea glass that I am unsure what to do with. I would like to make some jewellery but I need to look into what I need to do for that!


I hope you have enjoyed this driftwood crafts post and if you have any ideas of what to do with the sea glass please leave a comment! Oh and don’t forget to follow me!!!

Wednesday, 13 January 2016

Personalised Tote Bags


Just after Christmas a large craft shop had some plain calico tote bags reduced so I bought a few and didn’t have a clue what I was going to do with them. I thought this would be a great opportunity to try a couple of different things.

I bought an embroidery foot for my sewing machine before Christmas and thought this was a great time to try it out. The technique I wanted to try is where you just keep stitching, there is no break in the pattern. I traced out my pattern and got down to it. Here it is half done:

(Yes I know my stitch ripper is missing its safety ball!!!)

I was really unsure about the design but the more I got into it the happier I was with it. I also tried another pattern on the back panel but… well… it didn’t go so well so I cut it off and replaced it with a different colour panel and I am very happy with the result:

The second bag I did I used a fabric pen to draw a nice design. I love this bag but I would like to add a couple of other designs in each corner.


And finally I dyed the last two bags emerald green. Which is a fun process in itself. I love these bags and now I have 4 unique tote bags to use for my shopping.


I would encourage anybody to decorate their own bags as it’s a not a big project and you get something unique and personal at the end! I will also do a tutorial post in the future on how to make you own easy little tote bag.