Colourful

Colourful

Wednesday, 27 January 2016

Protective Case Post

 It’s been a while, but on the plus side I have very nearly finished the cross stitch for my friends baby!

I bought Mr TimeForCrafts a lightbox for Christmas so now I’m making a cover for it so it can be stored safely and carried about if and when needed. I have a nice soft but thick fabric for the inside so the lightbox doesn’t get scratched, a fabric chosen by Mr TimeForCrafts and a zip that fits across the top of the bag.


I will write this up for the lightbox but you can adapt the method for anything you want to make a protective case for.

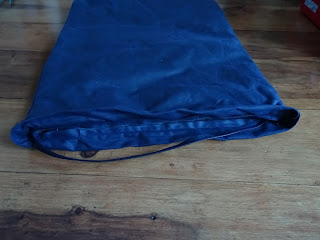
First of all I need to measure the lightbox, 48cm by 36cm. I am going to add half a centimetre on because it is thick fabric and don’t forget the seam allowance (this is going to play out very much like the drawstring bag post). I cut out the inner fabric and stitch up 3 sides. With the outer fabric, I made it 5cm longer than the inner and stitched around 3 sides.
Then placed the outer inside the inner, wrong sides facing. I then folded the top of the outer fabric over to the inner fabric and pinned the zip along where the two fabrics meet. Stitch.


I turned the bag the right way round and, with great difficulty, pinned the other side of the zip to the opposite side of the bag and stitched.


This should leave about a 2.5cm lip around the top of the bag, a nice stitched line around the bag that is also hiding the raw edge of the inner fabric and a zip inserted 2.5cm down from the top of the bag.


Don’t forget to iron it so it looks kind of nice!!!


Hope this makes sense, enjoy! 

Friday, 15 January 2016

Drawstring Bag Tutorial

This is going to be my first step by step. I am a little worried because I’ve never made a drawstring bag before but I suppose there’s a first time for everything! I am making this for a game where you draw a name out of a bag and try to describe who they are to your team mates, great game!!! Anyway I’ve gathered some bits and bobs and I’ll write as I go so I don’t miss anything out and let’s see what we get!

I am starting with:
o   Red fabric for the outer and the lining but you could have contrasting fabrics just make sure if you fabric has a directional pattern that you orientate the pattern the right way!
o   Fabric scissors and pinking shears
o   A ruler
o   2 metres of 5mm black cord
o   Sewing machine (you could sew by hand if you wanted)


I need to decide how big the bag. Mine has to be big enough for the name cards to be shaken up and a hand to draw the names out. So I’m going to go with an A4 size bag (nice and easy, everyone knows how big that is!!!) Just remember whatever size you choose to take into account the seam allowance, I am going to use the 10mm mark on my machine.

1.   Cut 2 outer and 2 inner fabric pieces. Pin the 2 outer pieces together, right sides facing, and stitch round three sides. Pin the 2 inners together, right sides facing, and stitch around three sides but leave a gap the bottom edge big enough to turn the fabric through when you stitch the inner to the outer (2-3 inches is a good size).


2.   At this point you could press your seams open and make it easier to thread your cord at the end but I haven’t. I did trim the excess fabric from the seam and the corners so the bag lining sits better. Then turn the outer the right way round (right side out) and put it inside the lining so the right sides are touching (my outer bag and lining are the same colour so I couldn’t photograph this!). Pin around the top then sew round remembering your seam allowance then pull the outer bag through the gap you left at the bottom.


Slip stitch the gap and push the lining into place and iron flat. You should now have a beautiful lined bag!


I need to decide where I want the drawstring bit and I need to be accurate so I am going to measure it!

3.   Measure and inch down from the opening and mark all the way around the bag, then from that mark another inch down all the way around.


Stitch along both marks to create a channel for the cord or ribbon. If the cord or ribbon is thicker you will need to adjust the width of the channel.


Unpick the seam between the channel stitches to create the holes where the cord or ribbon with go through.


4.   You will need two pieces of ribbon or cord. Thread one end through one of the openings, round the whole bag and out through the same opening. Thread the other piece through the other opening and repeat. Tie off however you like.


Well there you go, a drawstring bag from start to finish. Hope it goes well for you and my instructions are clear and easy to follow. Enjoy J


Oh, a little celebration please for this being my 10th post!!!

Thursday, 14 January 2016

Driftwood Crafts

I mentioned before in the razor clam post  that I love beach crafts and the memories I have attached to them. So I wanted to share driftwood crafts today. Driftwood is amazing and it is not surprising that it can be hard to find because lots of people want it!!! The best time I found to collect it is first thing after a storm.

So I collected lots of driftwood and started small by making driftwood boats. I had a long strip as the base and tried to use pieces that were ‘boat shaped’ to screw into the base, I used thinner straight pieces as masts and made some plain fabric sails attached to the boats with twine. The boats are about the width of a standard bookcase (that’s where these boats normal live!)


This piece of driftwood is a candle holder. It is a large piece of wood that I sunk tealight size holes into the top. It has such a unique grain and is just beautiful. This one was a little harder to photograph!


And finally I have this beautiful driftwood heart. I spent a long time planning out what pieces I was going to use and where they were going to be placed and at one point it was a star not a heart but I finally settled on this layout. I had a thin piece of MDF that I used to back the heart and the larger pieces are tacked to it, the rest are held in by a little glue and very careful placement (wedged in!) It is a wall hanging (another reason for the MDF) and hangs in my kitchen.


I also have a little jar of sea glass that I am unsure what to do with. I would like to make some jewellery but I need to look into what I need to do for that!


I hope you have enjoyed this driftwood crafts post and if you have any ideas of what to do with the sea glass please leave a comment! Oh and don’t forget to follow me!!!

Wednesday, 13 January 2016

Personalised Tote Bags


Just after Christmas a large craft shop had some plain calico tote bags reduced so I bought a few and didn’t have a clue what I was going to do with them. I thought this would be a great opportunity to try a couple of different things.

I bought an embroidery foot for my sewing machine before Christmas and thought this was a great time to try it out. The technique I wanted to try is where you just keep stitching, there is no break in the pattern. I traced out my pattern and got down to it. Here it is half done:

(Yes I know my stitch ripper is missing its safety ball!!!)

I was really unsure about the design but the more I got into it the happier I was with it. I also tried another pattern on the back panel but… well… it didn’t go so well so I cut it off and replaced it with a different colour panel and I am very happy with the result:

The second bag I did I used a fabric pen to draw a nice design. I love this bag but I would like to add a couple of other designs in each corner.


And finally I dyed the last two bags emerald green. Which is a fun process in itself. I love these bags and now I have 4 unique tote bags to use for my shopping.


I would encourage anybody to decorate their own bags as it’s a not a big project and you get something unique and personal at the end! I will also do a tutorial post in the future on how to make you own easy little tote bag.

Sunday, 10 January 2016

Apologies and Owls!

Writing a blog is very hard!!! I have been asked to cross stitch a baby sampler for a friend’s baby due in February, so I may not have much time for posts but on the plus side I am doing something I enjoy and hopefully she will be very happy with it!

So to apologise for the lack of posts I am going to leave you with some owls. A couple of years ago a friend of mine bought me a ‘make your own owls kit’ (pictured below). They are incredibly cute and easy to make.


So I made my own template inspired by the kit and made a couple of owls of my own. I have one in white and grey that I use as a Christmas decoration and I have made a few in nice bright summer colours and given them to owl enthusiastic friends! You could even make quite a few and string them up like bunting. So here is the template for my own super cute owls:
I made mine with felt because it doesn’t fray and it comes in a massive variety of colours but you could make them from any fabric. Mine are about 10cm by 7cm but you could make them any size you like. I also cut the body in one colour and the wings, eyes and beak in a contrasting colour.

Cut all the pieces out of whatever fabric and colours you are using. I used fabric glue to attach the pupils to the eyes and the eyes to the top half of one of the body pieces. Glue the wings on either side of the bottom of the body piece and glue the beak in the middle of the eyes and wings. It should now look like this:
I then placed the pieces together and blanket stitched around the outside leaving a little gap, I stuffed the owl and them finished off the blanket stitch. There you go, nice easy little owl ready to go as presents or whatever you decide to do with it.

I added a few stitched details to the wings before stitching it together but I don’t think it is needed. I will get some pictures but at the moment the owl I still have is packed away with the Christmas decorations and I can’t look at them again just yet! I will make another one and pop a picture up for you all later!!!

Well, I will let you know when I finish the baby sampler for my friend and hopefully I will put another crafty post up soon.


(Just to say a big thank you to Mr Timeforcrafts for drawing up the templates digitally for you lovely people out there in Blogland as all my templates are old school and on bits of paper in various folders.)

Tuesday, 5 January 2016

Wire Bike

Just a quick one for this post. My Mother-in-law piqued my interest in wirework when she was collecting bits and bobs for steampunk jewellery. So I bought some wire but didn’t have a clue what to do with it, I will eventually try some other type of wirework but for now I made this lovely bike.


I had these beautiful buttons in my button collection and wanted to do something special with them. I free-handed the shape of the bike but the more organised among us could draw it out and lay the wire over the top so that all the twists and curves are perfect. I think this little bike is the start of a lovely wirework collection.

Monday, 4 January 2016

Razor Clam Candle Holders

Hello again. Before I start can I please point out that I found the ‘Follow Me’ Button to add to this blog so YEY, please follow me!

I lived in the South for a couple of years before returning to the north and let me tell you, the South West coast is beautiful! I was based in Dorchester and was 5 minutes from the nearest beach. The reason I’m telling you this because I love beach crafts! I had bags of driftwood, jars full of sea glass and bowls full of shells. You never know when the crafting muses will strike or what you might need!  


So in this post I want to show you some razor clam shell candle holders. I think when the candle is lit, the glow cast through the shell looks lovely and now I’m back in the North they are a lovely reminder of the warmth of the South.

I collected a lot of these, made two candle holders and still have a jar full of shells!  What you’ll need is a clean jar, like a jam jar, your go to glue product (I used a glue gun) and of course enough razor clam shells to fully surround the jar.


I sorted the shells out so that all the shells on one holder were similar heights. Then I just started to glue the shells to the jar. For the more organised among us, you can map it out and make sure there is no overlap but I am not that organised and it’s a natural craft so I wasn’t too bothered. In fact it then inspired me to do anther holder but with a second smaller round over the top of the first.

So there you go, I have lovely candle holders and a nice memento of my time in the South.


I have a couple of other beach keepsakes that I want to share with you so look out for those!

Cushions galore!

A couple of months ago my sitting room had a red theme. The cushions, settee covers and throws were red and the sitting room had many red accessories. I fancied a change after near on 7 years of this colour scheme and took the opportunity to make some of my own stuff.

After talking with Mr TimeForCrafts, we decided grey was nice base colour and we could keep red accessories because we like the colour. Our settees are from a popular flat pack furniture store and you can buy different coloured covers for them but I fancied trying out my sewing machine skills so I searched the internet high and low for a pattern but I couldn’t find one. I figured I could unpick one of the covers I have and take a pattern from that (which I have done with clothes that are a bit worn but I like the cut) but life got in the way and the option I was left with was buying grey covers from the aforementioned popular flat pack shop. One day I will make a pattern and put it up one here for other people in the same position as I was. This, although being the easier option, was a little sad as I wanted to personalise my home but then it hit me… I am going to need new cushions and throws to match the new covers. *fist pump* craft time!

So keeping with the red and grey theme I bought some beautiful bold patterned fabric, one white and the other with big splashes of red in keeping with the rest of the room, contrasting plain grey cotton for the back panels and grey zips. Cushions are a wonderful thing to make. They are simple to make, you don’t need a lot of fabric to make one and it’s a nice was of adding your own touch to a room. This is how I made my basic covers:

Measure your filling for the pillow. Mine was 50cmx50cm. So you will need a piece of fabric 52cmx52cm in both fabric choices (to allow for a 1cm seam allowance). I used a 46cm zip.

I do not own a zip foot for the sewing machine but I managed just fine with a standard machine foot. Place the two fabric pieces, right sides facing up, next to each other and pin the zip in place centred between them and stitch as close as you can to the zip teeth to make a nice smooth join.

Then fold the fabric together right sides facing each other, in together and stitch open sides up remembering your seam allowance. Also don’t forget to stitch up the little bit either side of the zip.

Oh make sure you leave the zip open so you can turn it the right way round again otherwise you will have just sealed your cushion up!!!

Turn it the right way round, put your filling in, zip it up and voila one basic cushion cover.

There are other ways of doing cushions. I have made some in on single fabric where I measured a 52cmx102cm (1cm seam allowance) fold it in half (right side facing) insert zip as above and sew the two open sides and either side of the zip. You could pipe the edges of the cushion but I found this is a nice and easy way of doing it and I think they look great!


This is tutorial number two. I want to apologise as I forgot to photo my step by step when I made them. My next cushion craft will be patchwork so look out for that!

Sunday, 3 January 2016

Knitting friends

What a day today has been! I have a lot of backlog crafts that I would like to show you, including felt zombies, button brooches and some other nice little goodies and it has taken hours to photograph, thank goodness for Mr TimeForCrafts who helped out!

So before I get into my crafting, I wanted to show you this little treasure. She sits on my bookcase in the sitting room making me smile and reminding me of passing my driving test.

When I first passed I was not very confident so I didn’t drive. After a couple of weeks a friend said she had something for me but I would have to drive to hers to get it. Every time we met up she would gently remind me that there was something at hers for me. After about 4 months I finally plucked up the courage to drive over and was gifted this beauty! So glad I did.


Anyway, hope you enjoy this while I write up another post!!!

Saturday, 2 January 2016

Star Lights


I thought seen as this is a craft blog maybe I should actually put some craft posts up! 

I made this pair of star lamps for Christmas but I think they are pretty and they are going to stay up all year round. Plus they give off a nice light so when me and the O/H are watching TV we can just put these on for backlight. They are about 40cm tall, so not too big and are kind of straight forward to make.

I don’t know whether it’s best to make a list of needed items but there is only 3 things so…

First of all I used an A1 sheet of thick silver card (recommend minimum 3mm thick) from any good craft shop (I got 2 stars out of one A1 sheet). Then a pack of 20 bulb LED lights per star, I think any colour will look nice. You will need whatever glue you find best for your card crafts, this star does free stand so make sure the glue is up for that! Oh and whatever batteries your LED lights take otherwise, like me, you will be running to the shop after spending time on this craft because you forgot them!

Right, the hard part is the star shape so I will try my best for you:

Draw a 40cm diameter circle using a compass or if you have anything circular that size just draw round that! Make sure to mark the centre. Then using a protractor divide the circle into 5 equal sections (67 degrees will give you perfect sections) and join each point to its 2 opposite points. It doesn’t write well but hopefully it looked obvious when it’s drawn up on the card otherwise you could print this off:

Just make sure that when you print it of it measure 40cm from point to point!

You will then need to cut out 10 rectangles 6cm by 14.5cm. On the star you will need to pierce 20 holes evenly around the star to pop the bulbs through but don’t make them too big otherwise the bulbs will pop out! Try and place them about 1cm in from the edge of the star. You could really put as many lights in it as you wanted but I think it looks nice with just the outside (if you do put more in make sure you get fairy lights with the amount of bulbs per hole needed!).

Glue the rectangles around the edges of the star so you end up with a box type star without a lid. All the silver should be on the outside like so:


Pop your lights in the holes, you could fix the lights in place with glue if you like and I glued the battery pack to the inside of one of the bottom star points. Batteries in and away you go!!!

I like the stars as they work in my sitting room but you could do other shapes they just need a flat bottom so they can stand upright. They are lightweight so could be mounted on the wall with a simple picture hook (therefore wouldn’t need a flat bottom) and because they are LED the bulbs don’t heat up so no fire hazard there!


I hope for a first craft tutorial this is ok and makes sense!

Hello

So first of all Happy New Year all you lovely people out there in blog land! Hope you all had a good one.

Hello and welcome to my first ever blog and first ever post. I am hoping to put some nice things up on here, maybe some tutorials but mainly just to show what anyone can do with a little time.

I am not the most artistic of people but I am more than happy to give any craft a go as, hopefully, you will see. I knit, crochet, cross stitch, felt, sew, papercut, appliqué and make my own candles. I’ve made handmade paper, wall hangings with driftwood and made origami dinosaurs. I’ve done other bits and bobs but we’ll get there later.  

This year I would really like to try pottery throwing and glass blowing as well as, you know, whatever else I see along the way. 2016 is a year of possibilities and new crafts to do! I know it’s early but I may also look into a Christmas market stall at the end of the year mainly because I don’t think there is much more storage space in my flat and I’m not willing to give up crafting!

So that roughly sums up my welcome post and outlines what I would like to do here. Keep your eyes peeled for my first craft of the year!


Dee